
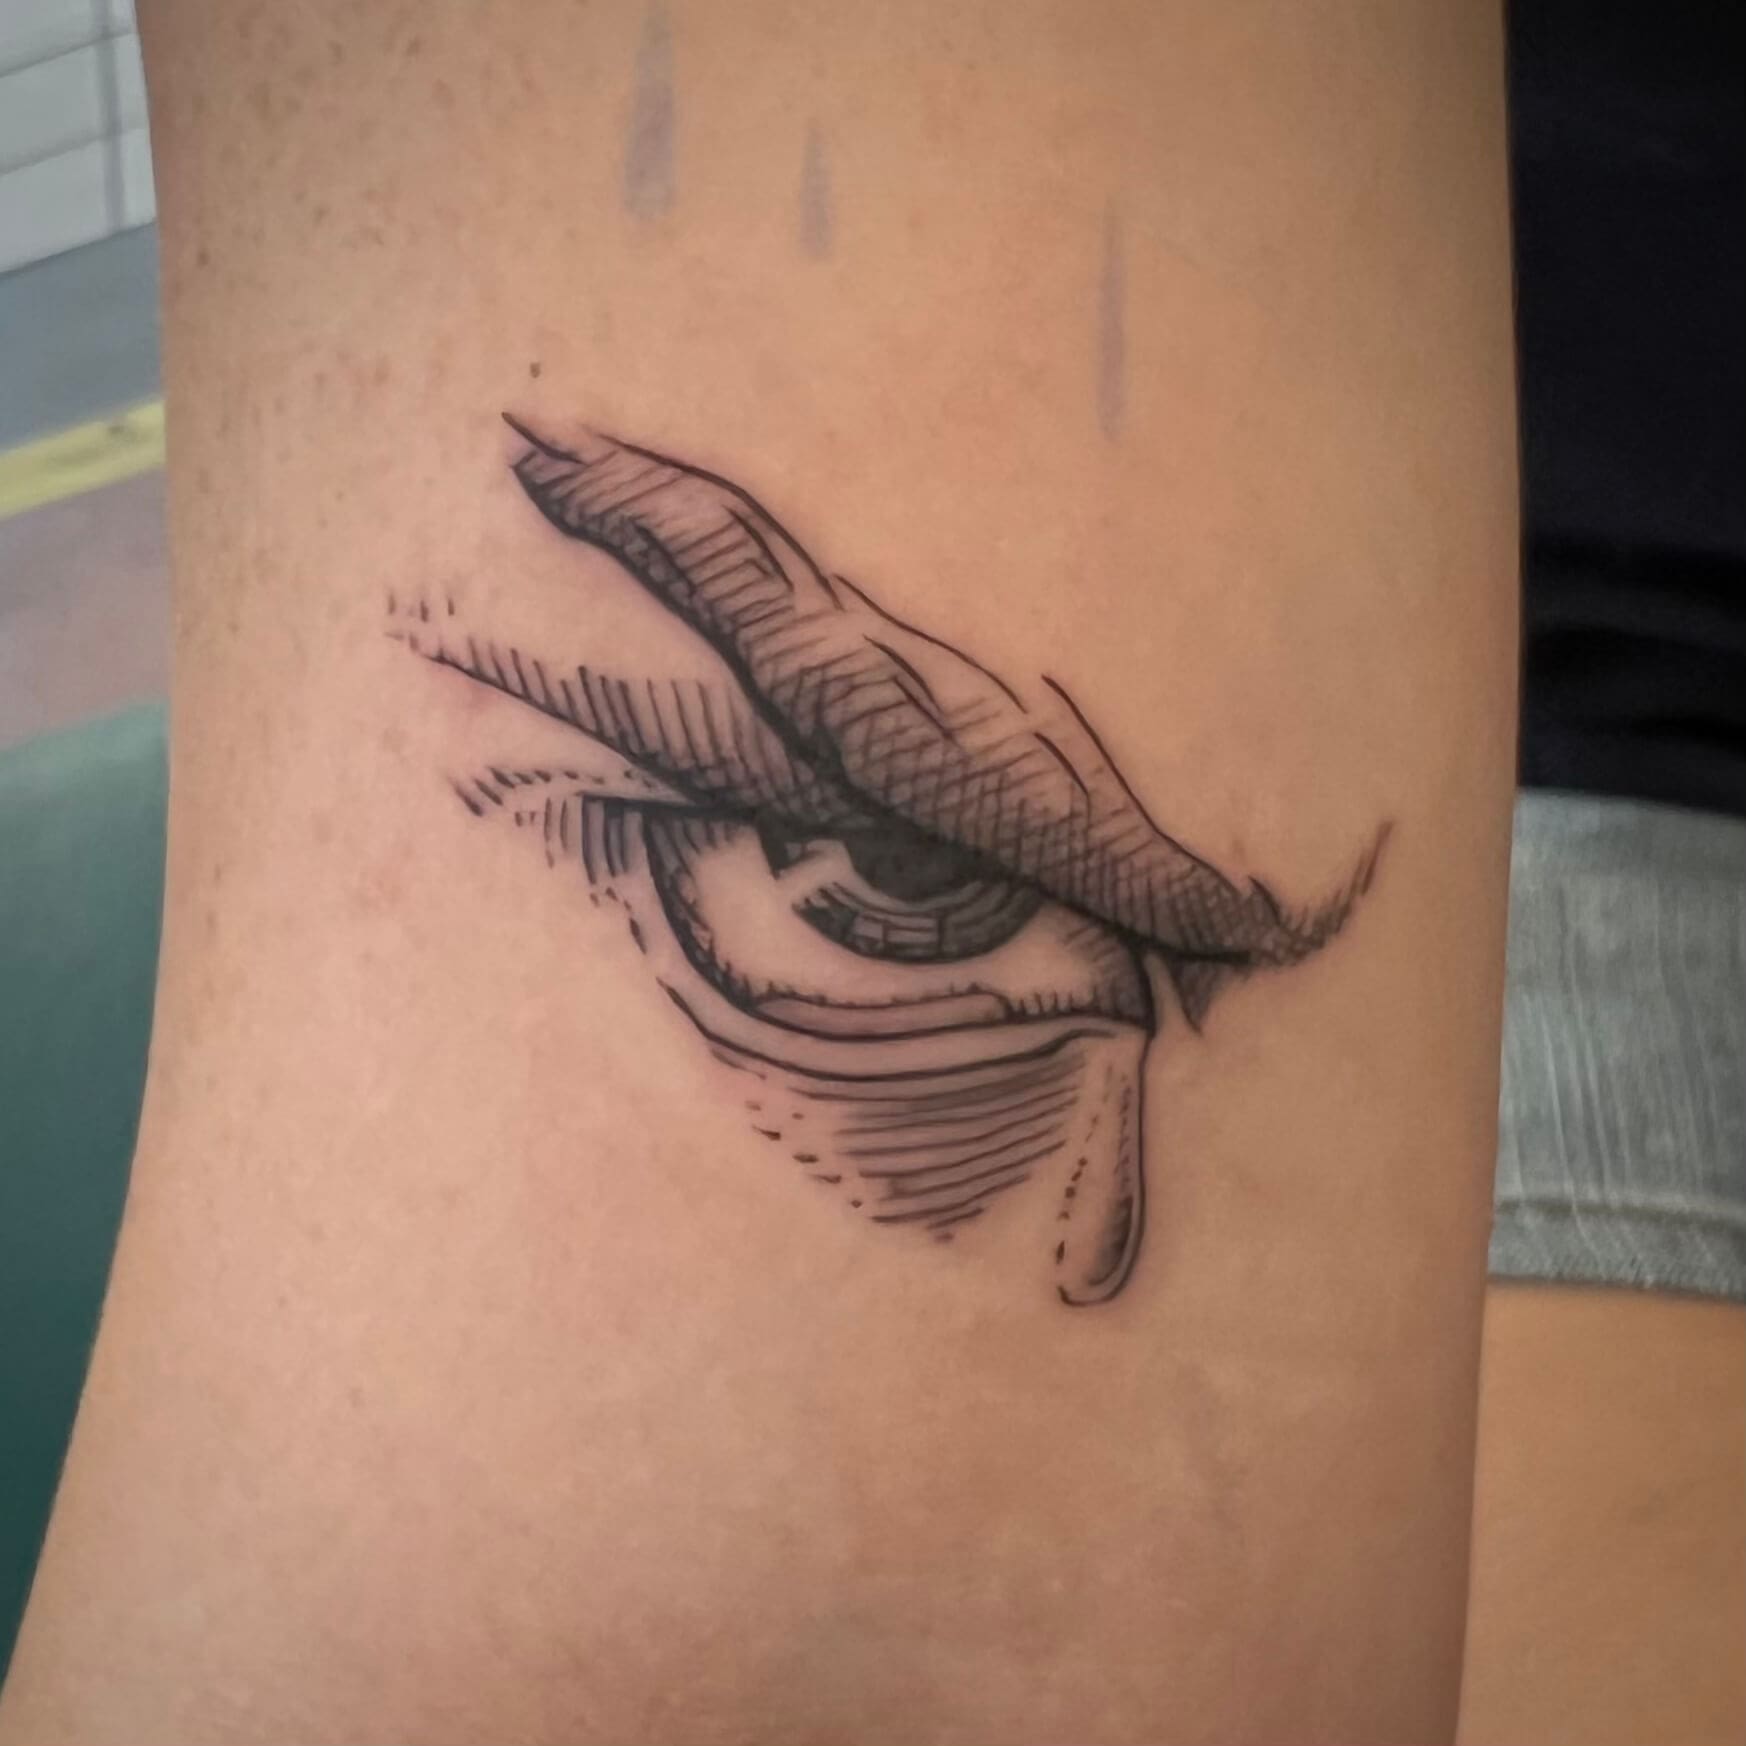
Etched tattoos use fine contours, hatching, stippling, negative space, and small areas of black to create a printed appearance. Proper healing helps these elements settle without unnecessary irritation, damage, or loss of clarity.
A fresh tattoo is also healing skin, so aftercare should follow the instructions provided by the artist. Contact a healthcare professional when symptoms suggest infection or an unexpected skin reaction rather than trying to treat the problem through online advice alone.
Key Takeaways
- Follow the artist’s bandage and cleaning instructions because different dressings require different removal times.
- Wash the tattoo gently with mild soap and warm water, then pat it dry instead of rubbing.
- Use a simple moisturizer or the product recommended by the artist.
- Mild redness, soreness, clear fluid, itching, flaking, and light scabbing can occur during normal healing.
- Avoid swimming, direct sunlight, tight clothing, and unnecessary friction while the tattoo heals.
- Seek medical care for spreading redness, worsening pain, fever, pus, heat, red streaks, or significant drainage.
Why Aftercare Matters for Etched Linework
Etched tattoos often contain closely spaced lines and small skin breaks. Irritation, scratching, heavy scabbing, or repeated friction can affect how cleanly those details appear after the surface settles.
Aftercare does not change a poorly designed tattoo into a durable one. Scale, application, line spacing, placement, and artist technique remain the main factors behind long-term readability.
Care mainly supports the skin while it heals. It also helps reduce avoidable problems such as irritation, infection, and damage caused by picking or rubbing.
Etched Tattoo Healing Timeline
Healing speed varies by tattoo size, placement, skin response, and individual health. Larger tattoos and heavily worked areas may remain sore or visibly irritated longer than smaller pieces.
| Healing Stage | What You May Notice | Main Care Priority |
| First several hours | Bandage, soreness, mild swelling, fluid | Follow bandage instructions |
| Days 1 to 3 | Redness, tenderness, ink or clear fluid | Gentle washing and drying |
| Days 4 to 7 | Dryness, early flaking, itching | Moisturize and avoid scratching |
| Week 2 | Peeling, light scabbing, dull appearance | Let flakes fall naturally |
| Weeks 3 to 4 | Less flaking and irritation | Continue gentle care |
| Following weeks | Surface appears settled | Assess only after full healing |
This timeline is approximate. Cleveland Clinic notes that the visible surface and deeper layers do not necessarily complete healing at the same time, and overall healing varies by tattoo and placement.
The First Several Hours
The artist will usually cover the tattoo before you leave the studio. The dressing protects the area during the earliest stage, but removal timing depends on the bandage type and the artist’s process.
Do not remove or replace the covering based on a generic schedule when the artist has provided specific directions. Traditional wraps and adhesive film dressings may require different handling.
Wash your hands before touching the bandage or tattoo. Remove the covering gently according to the artist’s instructions rather than pulling it quickly from sensitive skin.
Days 1 to 3: Cleaning the Fresh Tattoo
Mild redness, swelling, soreness, and a small amount of clear fluid can occur after tattooing. These responses should gradually improve rather than becoming more painful or spreading.
Wash the area gently with warm water and mild soap. Avoid scrubbing, rubbing, or directing strong water pressure onto the tattoo.
Pat the area dry with a clean disposable towel or allow it to air-dry briefly. Mayo Clinic and Cleveland Clinic both recommend gentle washing and drying rather than rubbing the skin.
Apply only a thin amount of the moisturizer or ointment recommended by the artist. Heavy layers can leave the surface overly wet and may increase irritation.
Days 4 to 7: Dryness and Early Flaking
The tattoo may begin to feel dry, tight, or itchy as the surface starts peeling.
Fine etched details can temporarily appear less crisp beneath dry skin. This does not automatically mean that the lines have faded or fallen out.
Continue washing gently and moisturizing as instructed. Wear loose, breathable clothing when the tattoo sits beneath fabric to reduce sticking and repeated rubbing.
Do not scratch the tattoo even when the itching becomes distracting. Pressing or tapping around the area is less damaging than dragging fingernails across healing skin, but unnecessary touching should still be limited.
Week 2: Peeling and Light Scabbing
Flaking, itching, and some scab formation can be part of normal healing. These changes should improve over time rather than becoming increasingly painful, hot, swollen, or wet.
Let flakes and scabs separate naturally. Pulling them away can irritate the skin and may disturb areas where fine lines or small black accents are still settling.
The tattoo may look uneven during this stage. Some parts may appear darker while others look dull beneath peeling skin.
Do not judge line consistency during active peeling. Wait until the entire surface has settled before deciding whether any part healed lighter than expected.
Weeks 3 to 4: The Tattoo Begins to Settle
Visible flaking and scabbing should gradually decrease. The surface may appear smoother, but deeper healing can continue after the tattoo looks normal from the outside.
Continue using gentle skin care when the area remains dry or sensitive. Avoid exfoliating the tattoo while the surface is still healing.
Detailed hatching may begin to look more natural as excess dryness clears. The lines may appear softer than they did immediately after the session, which is part of the difference between fresh and healed tattoo photographs.
A touch-up decision should not be made while peeling, redness, or surface sensitivity remains. Follow the artist’s required healing period before sending final photographs or requesting additional work.
Caring for Fine Hatching and Skin Breaks
Fine hatching needs the same basic care as any professionally applied tattoo. It does not require aggressive cleaning or special products simply because the lines are narrow.
Avoid rubbing the tattoo with washcloths, exfoliating tools, or rough towels. Repeated friction can irritate the healing surface.
Skin breaks are intentional open areas between lines and black shapes. Do not mistake every lighter gap for missing ink while the tattoo is still peeling.
The healed design should be evaluated as a complete value structure. The silhouette, highlights, midtones, and black accents matter more than whether each small line looks identical to the fresh photograph.
Clothing, Exercise, and Friction
Loose clothing can help prevent fabric from sticking to or repeatedly rubbing the tattoo. Tight sleeves, waistbands, socks, or straps may be uncomfortable when they cross the fresh area.
Movement may also affect placements near elbows, knees, wrists, ribs, or shoulders. Follow the artist’s advice on exercise, stretching, and returning to activities that place friction or pressure on the tattoo.
The goal is not complete inactivity. It is to avoid unnecessary irritation, contamination, and repeated pulling across the healing skin.
Normal Healing vs Possible Infection
Normal healing usually improves gradually. Symptoms that spread, intensify, or appear with fever or pus require medical attention.
| Common During Healing | Possible Warning Sign |
| Mild redness near the tattoo | Redness that spreads or darkens |
| Mild soreness | Pain that becomes worse |
| Light swelling | Increasing swelling or heat |
| Clear fluid | Pus, odor, or significant drainage |
| Itching and flaking | Painful rash or open sores |
| Light scabbing | Red streaks from the tattoo |
| Temporary tenderness | Fever, chills, or feeling unwell |
Contact a doctor or dermatologist promptly when warning signs appear. Serious reactions involving breathing difficulty, intense swelling, chest tightness, dizziness, or widespread hives require urgent medical care.
Frequently Asked Questions
Can I sleep directly on a new etched tattoo?
Avoid placing unnecessary pressure and friction on the fresh tattoo when possible. Use clean bedding and follow the artist’s advice for the specific placement and bandage type.
Does black ink heal faster than muted color accents?
Healing time cannot be predicted by color alone. Application, placement, tattoo size, skin response, and the amount of work performed in the area also affect recovery.
Can I get another tattoo while the etched tattoo is healing?
It is usually better to let the current tattoo heal before adding work near the same area. Ask the artist when another appointment would be appropriate for your project.
When should healed tattoo photographs be taken?
Wait until peeling, scabbing, redness, and surface dryness have resolved. The artist may request photographs after a specific period based on the tattoo and studio policy.
Protect the Linework by Supporting the Healing Skin
Etched tattoo aftercare does not require complicated products or aggressive cleaning.
The main priorities are gentle washing, appropriate moisture, clean clothing, limited friction, and patience while flakes and scabs separate naturally.
Do not judge the final hatching or negative space while the tattoo is still dry, peeling, or irritated. Detailed linework should be reviewed only after the surface has fully settled.
Follow the artist’s instructions and seek medical care when redness, pain, heat, drainage, or other symptoms worsen instead of improving.